
Past Obsession: Shard Art
Several years ago, my mom and I were obsessed with Shard Art. My mom had taken a class at a local antique business and we caught the bug. Big time.
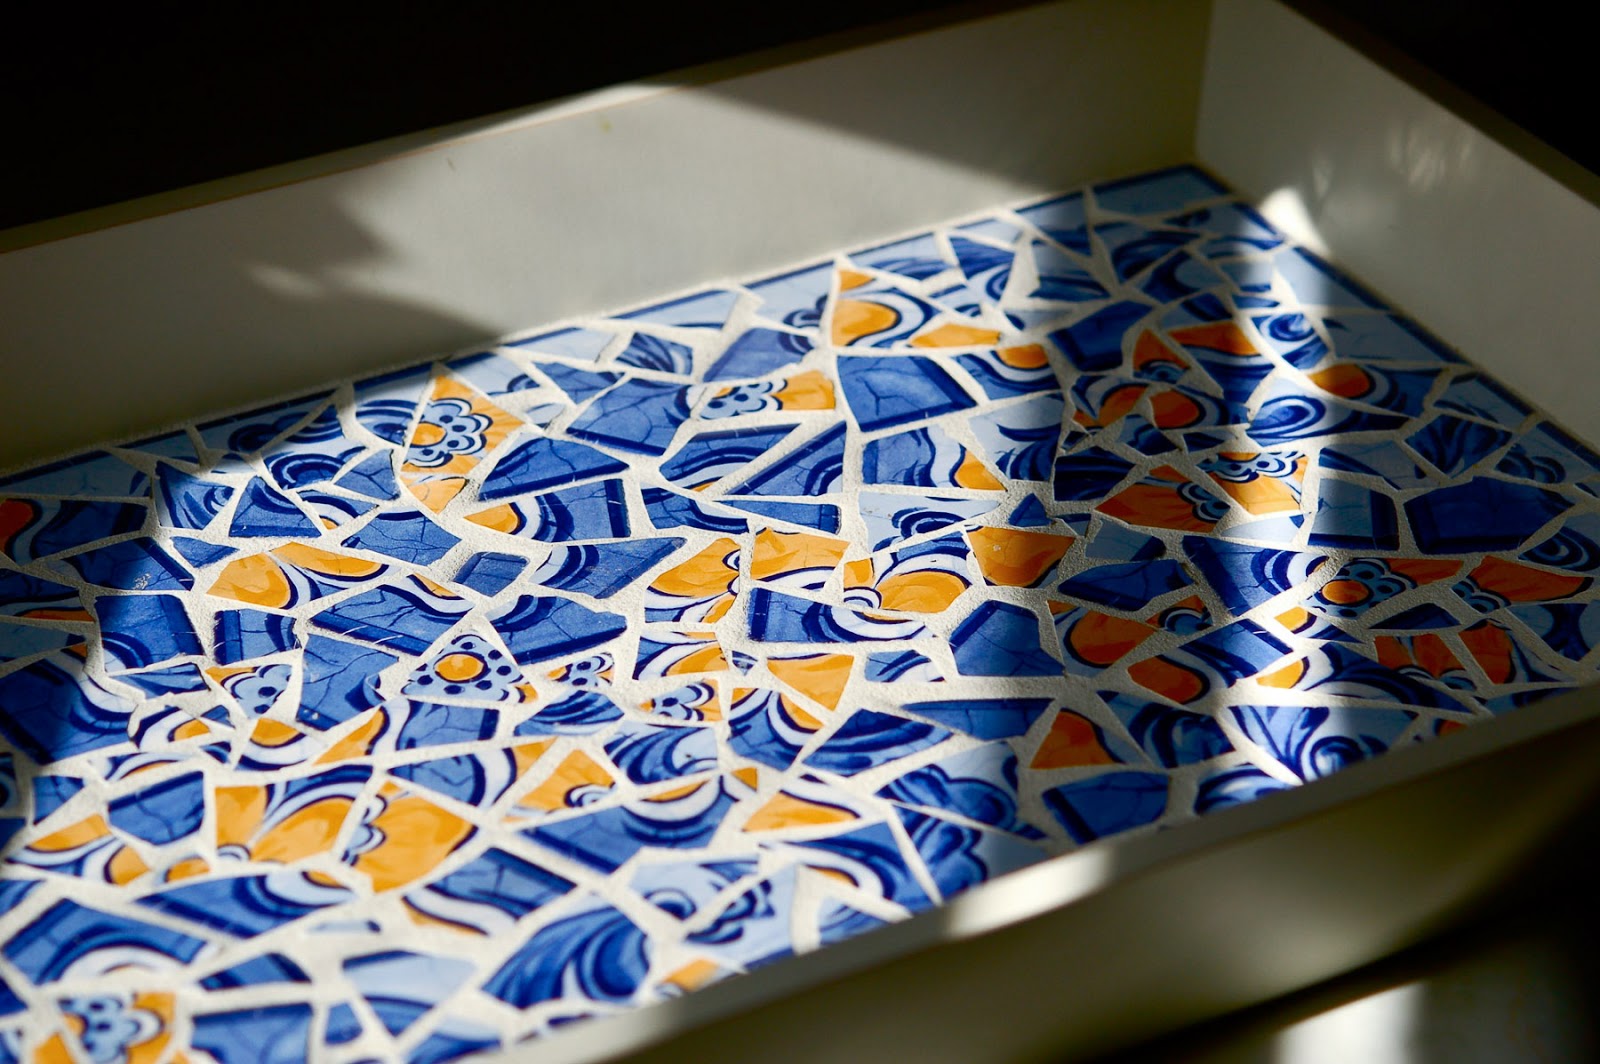
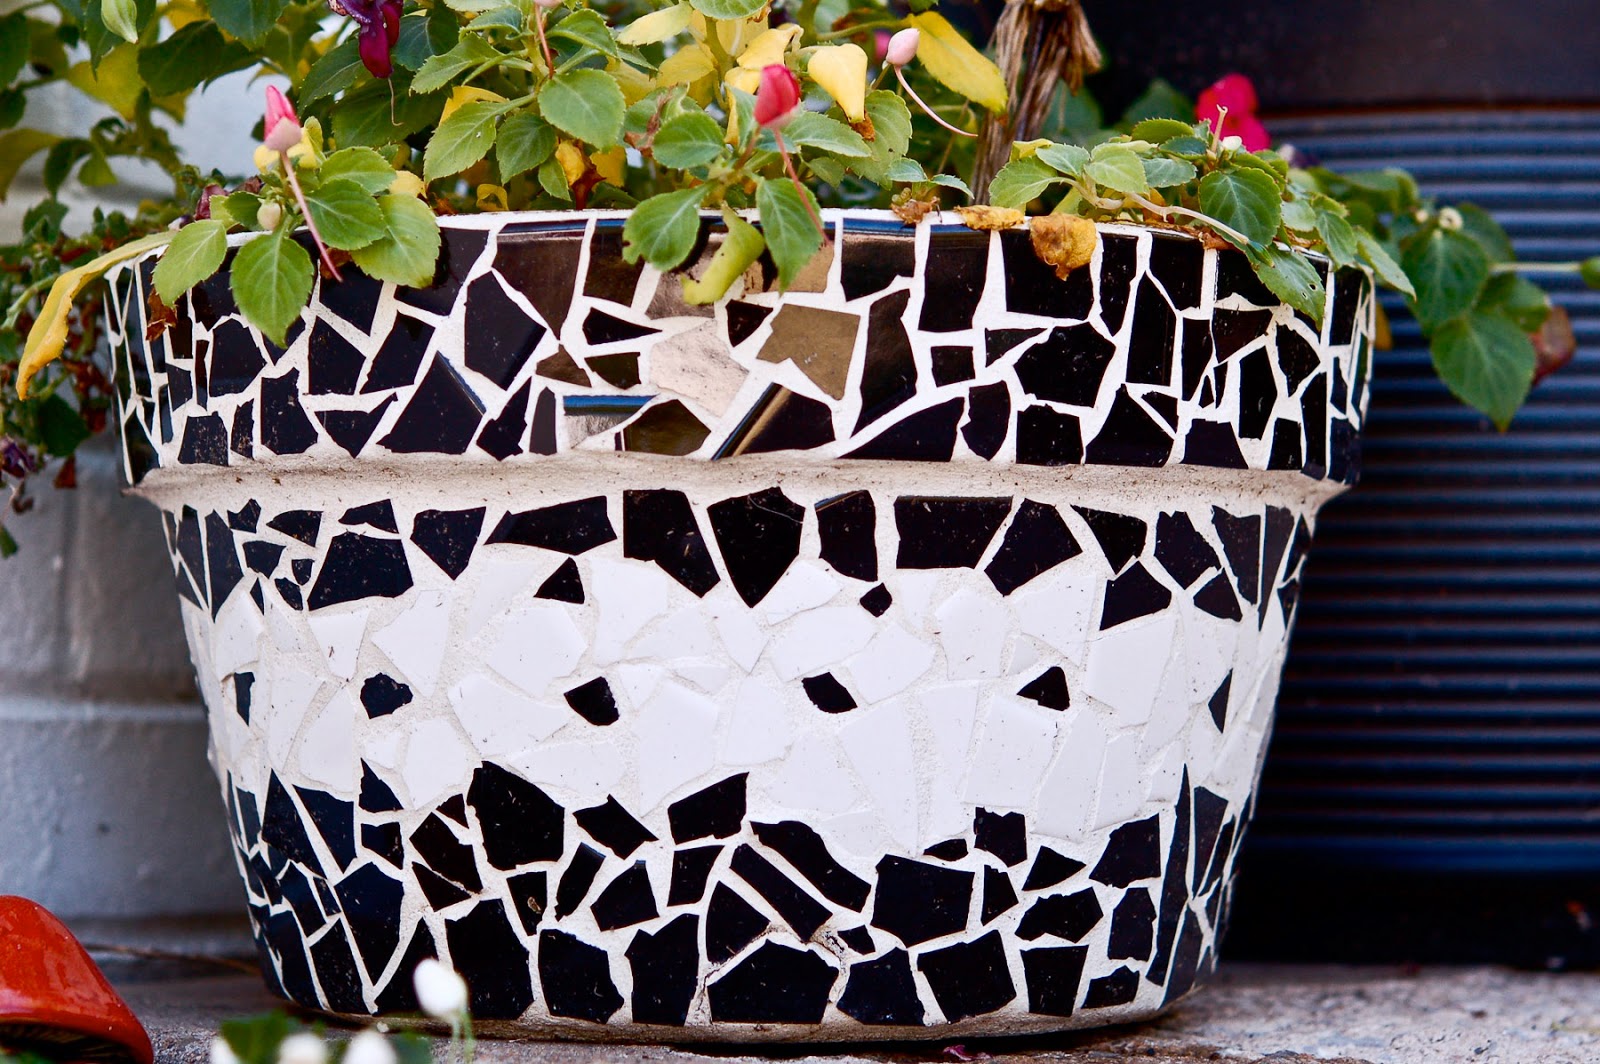
We looked through everything we owned to determine what we’d be willing to part with so we could break it. That was the best part of it. The breaking.

Some things were harder to break than others. For the more sturdy items such as tile or plates, we’d layer the item between two old towels and place it on a board (to protect the table) before hitting it with a hammer. I remember beating the heck out of a tile with a hammer trying to get it just the right size. It was a good way to get out any frustrations too.

Other items (teacups and figurines) were so fragile you had be careful not to pulverize them. Those we’d put in an old pillowcase and simply drop them on the floor or swing them against a doorframe. Teacups were tricky, because we wanted to keep the handles intact. Depending on what we were making, cup handles and little teapot lids were a special detail.

We found a lot of ‘treasures’ at a favorite thrift store that benefitted the blind. When the cashier would find out what were doing with the dishes we bought, she’d give us half off. “Oh, if you’re just going to break them, I’ll give you half off”. Hmmm… I always thought I should get half off only if I truly needed them and couldn’t afford anything else. Anyway, I once found almost a dozen green and white polka dot mugs there. They were really cute. I thought about actually using them to drink out of, but I couldn’t resist…

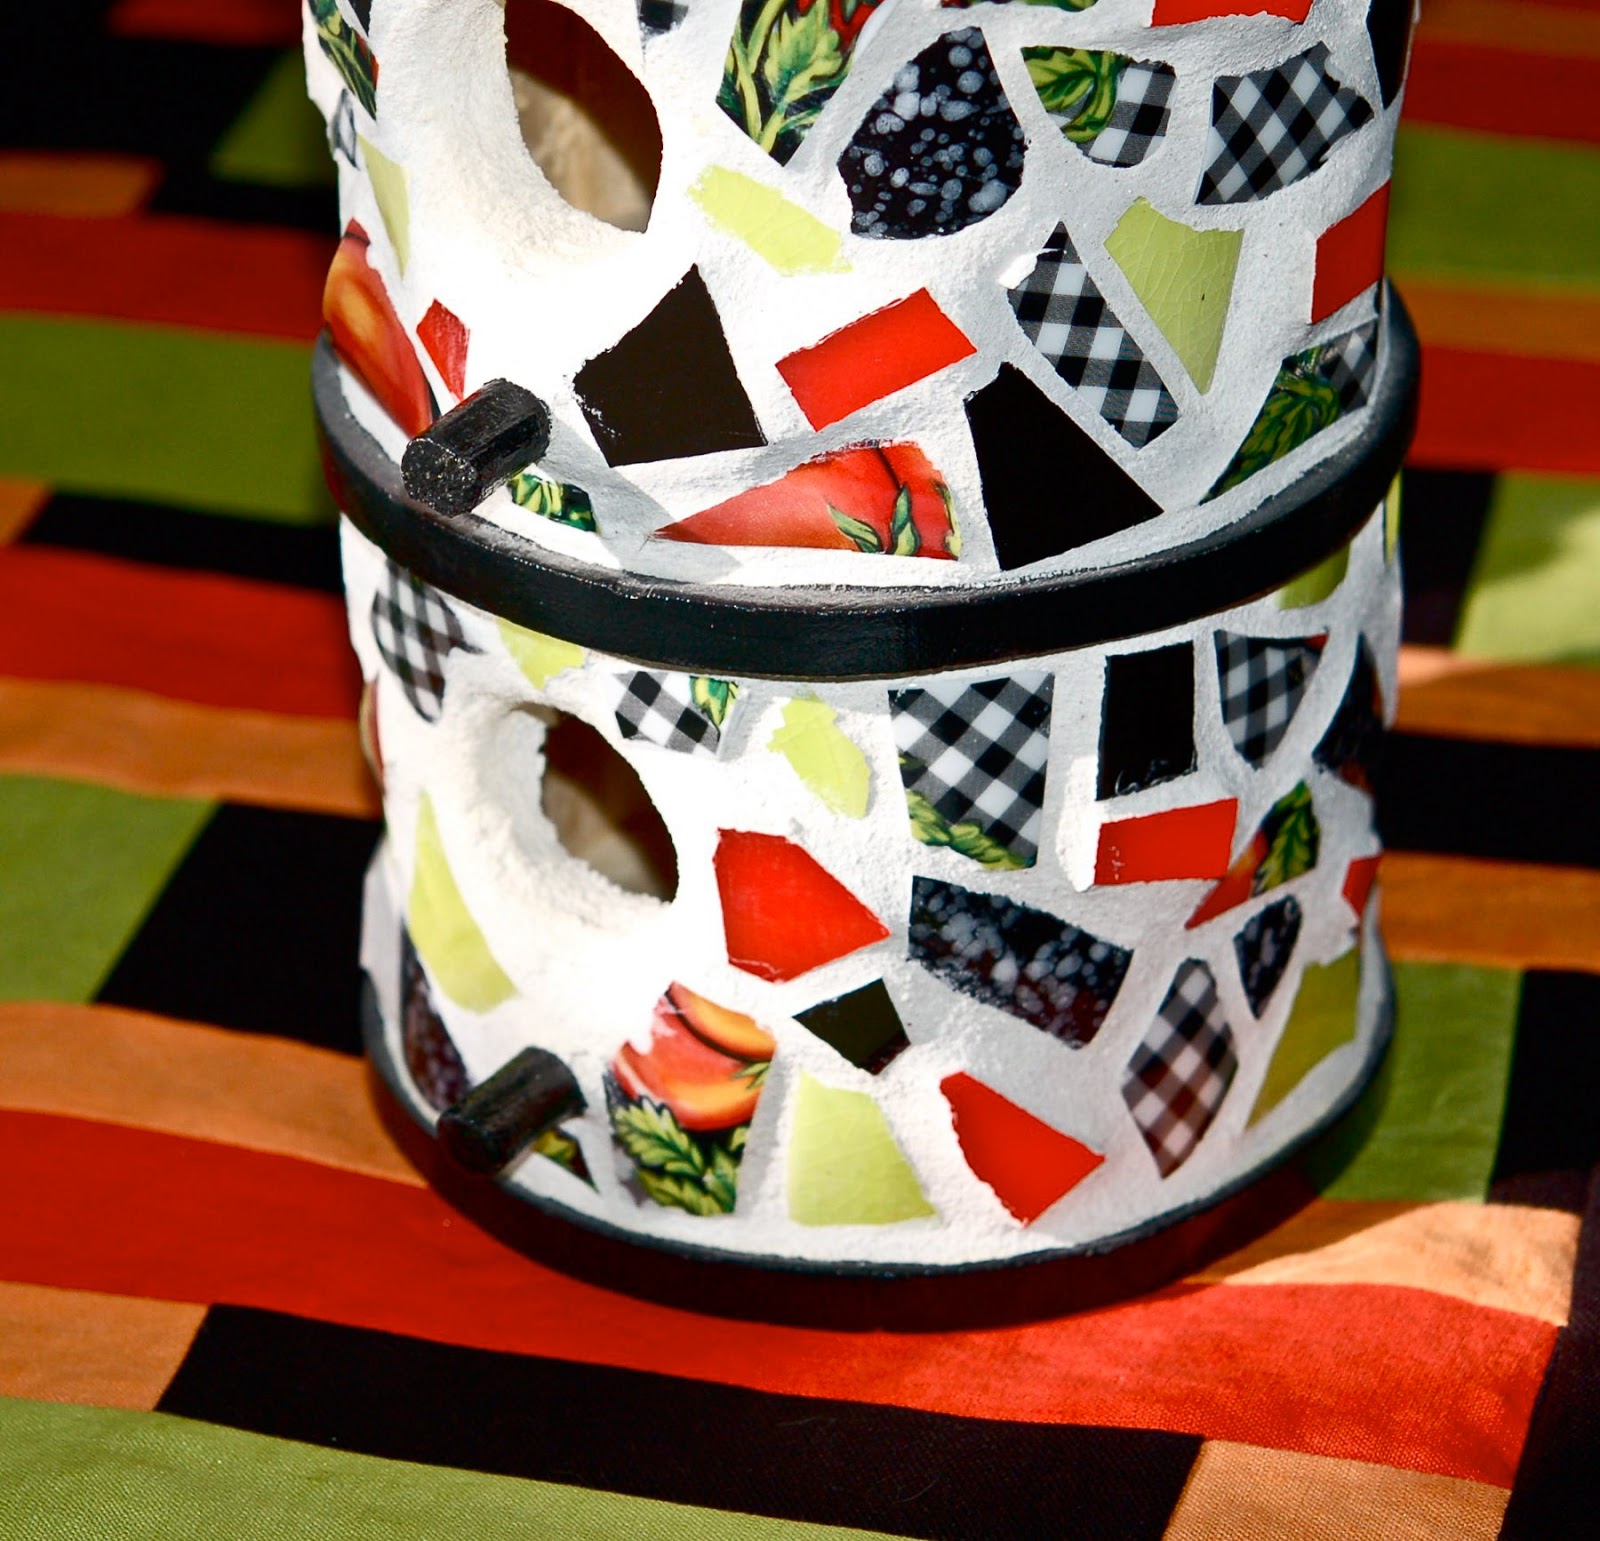
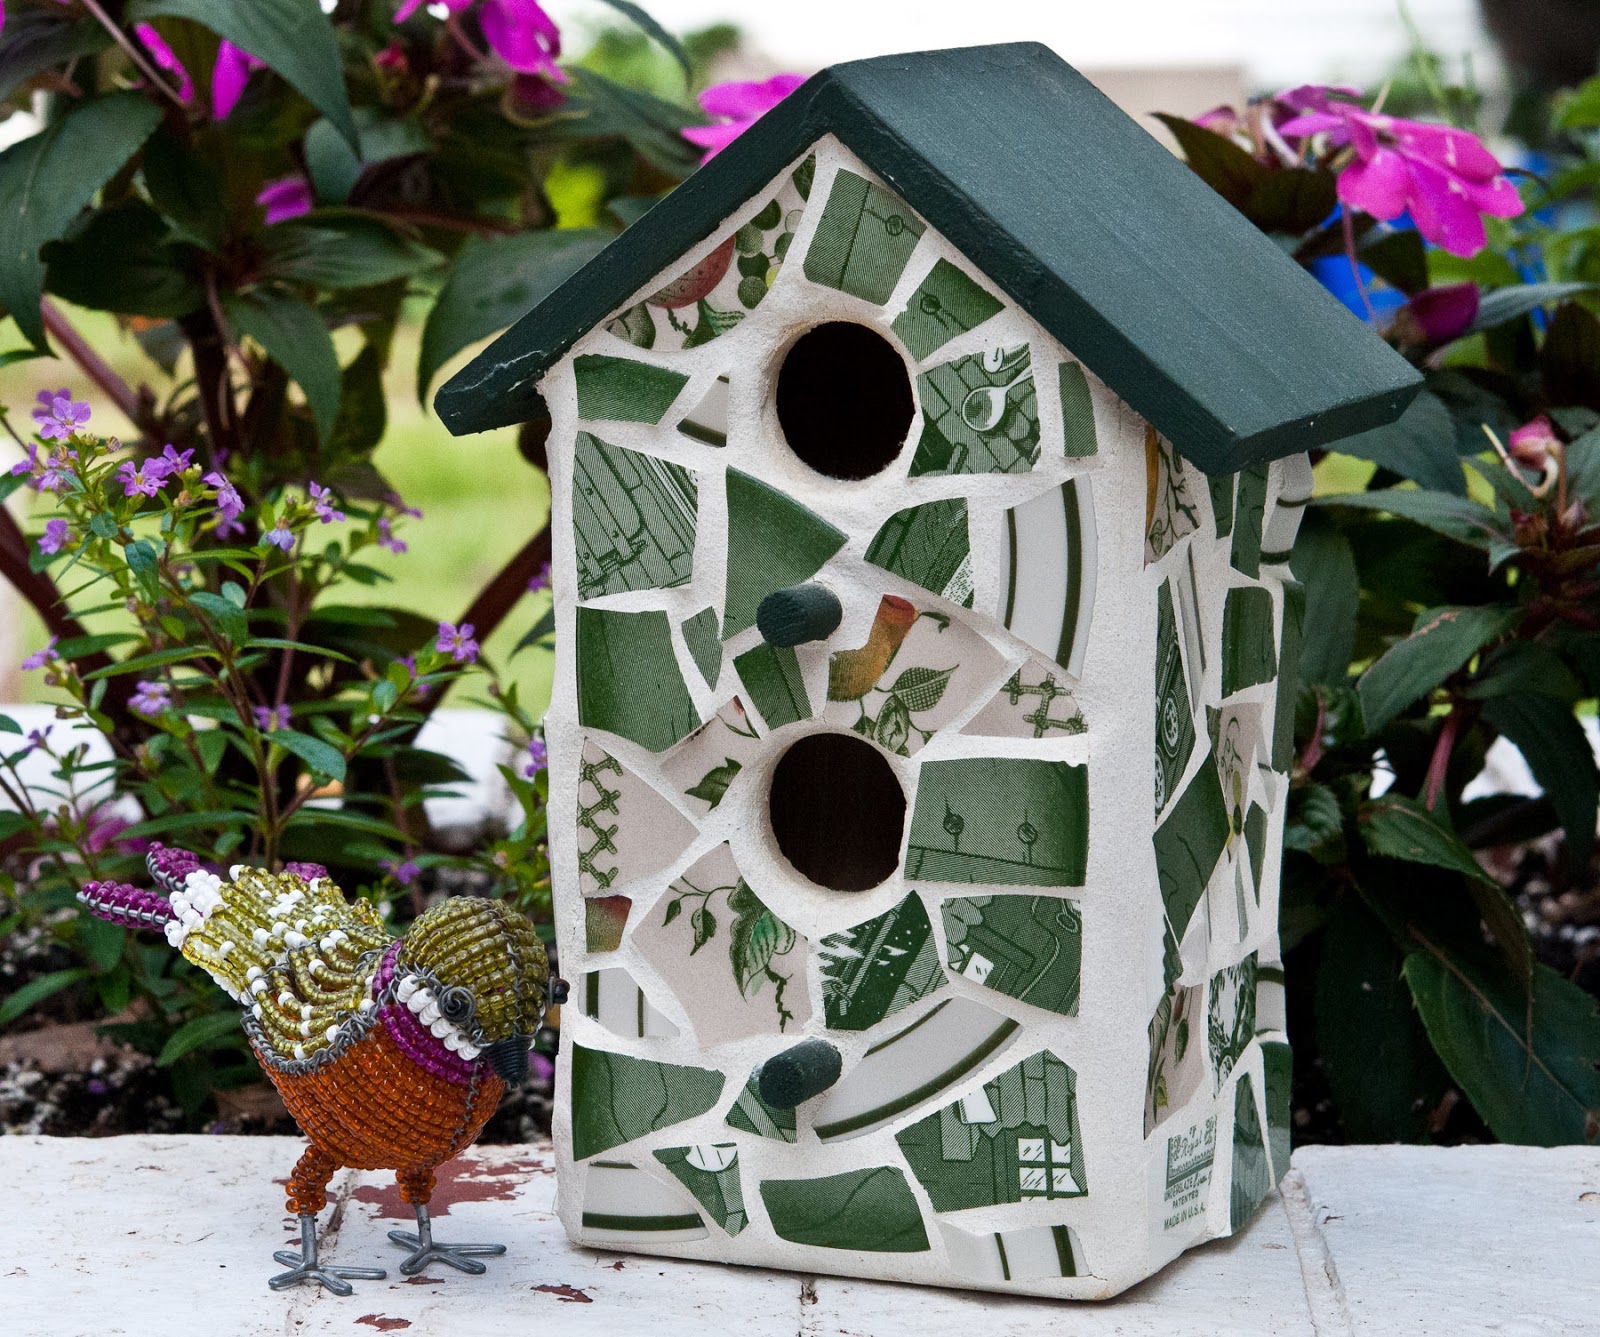
The birdhouse below is made from dishes that we used at our cabin in Lake Tahoe when I was a kid. I always loved them and they have sentimental value. I still get excited if I see them in a thrift or antique junk store. They were shipped to me and the soup tureen broke in transit. Heartbreaking at first, but then I used the broken pieces to make a couple of birdhouses for my sister and me. Now we have the memory of our cabin!
SHARD ART How-To:
Supplies:
- Tile, ceramic plates, cups, figurines, etc.
- Small board
- Two old towels
- Hammer
- Item to cover with tile
- Silicone glue (clear)
- Container for grout
- Container for water
- Old rubber spatula
- Sponge or baby wipes
- Table covering (vinyl cloth, newspapers, etc.)
Directions:
- Layer your item between two old towels and place on a board on a sturdy surface. It WILL damage your table, so put a board under before breaking. Using a hammer, break your items into pieces of desired size.
- Using silicone glue, arrange and adhere the pieces to the object you are covering. It’s almost as if you are putting together a puzzle. Sometimes you have to search for just the right piece to fill a gap. The closer together your shards are, the better. And don’t be gloppy with the glue. It doesn’t take a tremendous amount to work. [Be careful not to get glue on your hands. It doesn’t come off easily.]
- Once the glue is dry (which does not take long) mix a small amount of grout in a container that you don’t want to use again. Have another container of water nearby with a sponge. Mix the grout so that it is thick, but spreadable.
- Working in small areas at a time and using an old rubber spatula, generously spread the grout on your object. Use the spatula to push the grout down into the gaps. You want to keep pushing and smushing it down so that it gets underneath the pieces and gaps. This helps prevent against cracking. Don’t worry that the grout covers the shards, you’ll uncover them later.
- As you continue grouting the entire piece, you’ll see the grout become crumbly as it dries out. As this happens, simply add more water to your mixture. Use a damp sponge to help smooth out and push the grout between the gaps.
- When you are finished grouting, take a damp sponge and gently clean off the grout to expose the shards, rinsing the sponge clean as needed. Baby wipes also work well and are disposable. The shards don’t have to be perfectly clean the chalky white residue will come off easily after the grout sets.
- When it looks clean, set it aside to dry. It’ll be dry overnight!