
Do you Yudu? 'Cuz I do!

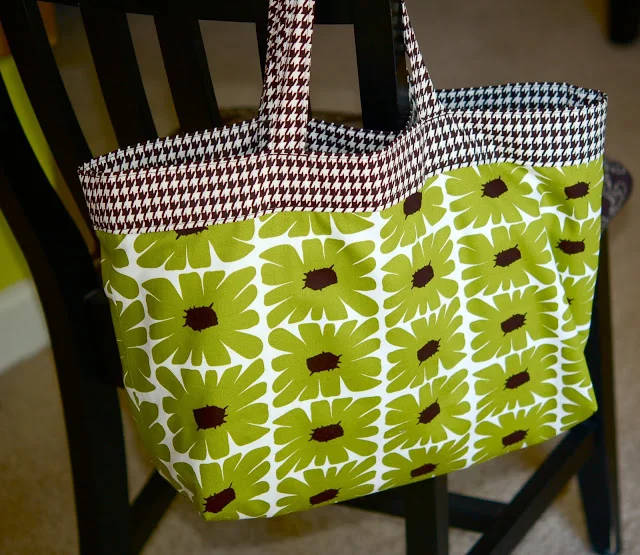
I'm just back from a week at our church Girls Camp. What a great time we had! I'd seriously love to go back and just hang out with the girls and without any responsibilities. Our cabin had a Pocahontas theme and I made us all t-shirts. Seriously! I made them!

I'd wanted a Yudu Personal Screen Printer since the day I first laid eyes on it. But, I just couldn't rationalize the price on a 'gadget' that I didn't know how much I'd use. Michael's had a one-day sale on Yudu's. Two-thirds off the regular price...so of course, I couldn't pass it up!
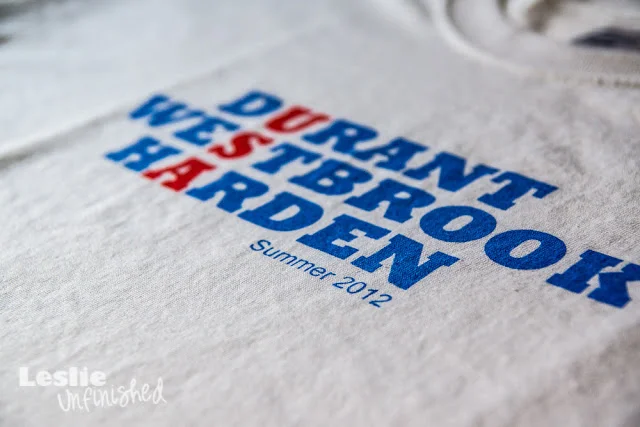
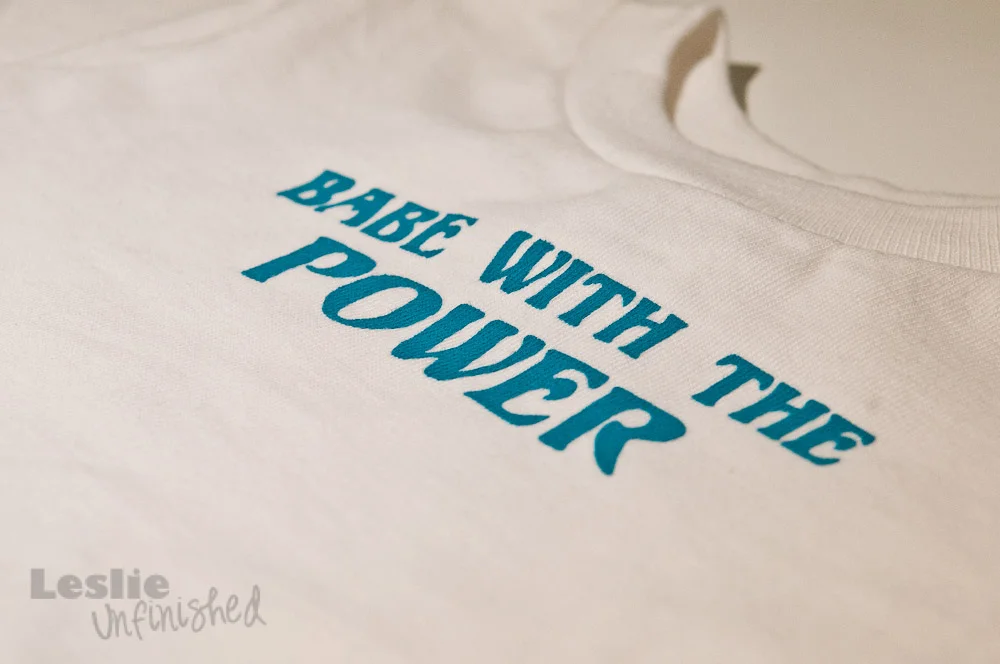
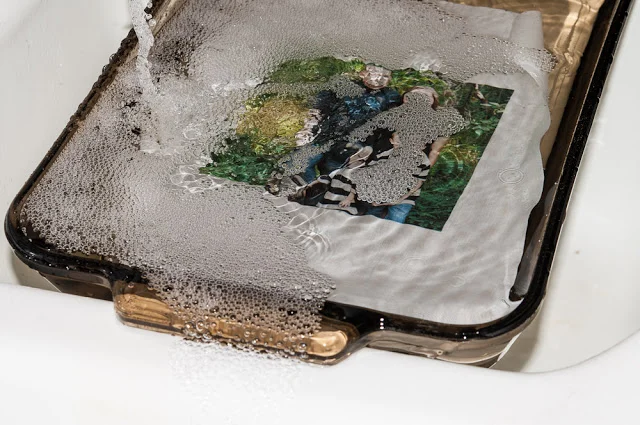
Did I say how awesome this thing is?Here's how it works:First, you send a transparency through your printer and print your desired design. You then adhere an emulsion to your Yudu screen that will serve as a 'stencil', if you will, and act as a barrier for the ink. When the screen is ready, you place your image and screen on the Yudu, cover it up with the special platen and push a button the 'exposes' your design onto the screen. The emulsion changes from green to blue after exposure. Then, with water, you simply rinse off the emulsion that turned green to reveal your design. The remaining emulsion acts as a barrier allowing the ink to only pass through the screen where your design is.Straight off, there are some things you need to know about the Yudu. It's great, don't get me wrong, but it doesn't come without some complications. The directions and enclosed video are clear and informative, but the directions don't always hold true to actual application. Here are a few of things I learned along the way. Hopefully, they will help you find the enjoyment in the Yudu and not the frustration.Tip #1:Be prepared to ruin at least one emulsion, if not more. I got it right on the third try. Just accept it and don't let it frustrate you.Tip #2:Your design is very important. It's best if the lines/text on your design are NOT too fine and small. You can see in the picture below, that I lost some of my detail where the feathers join and on the word Pocahontas.

Tip #3:Wetting your screen. The directions will tell you to "...wet your screen, but don't make it too wet..." before you apply your emulsion. In EVERY case, the screen has not been wet enough for me to adhere the emulsion. Fortunately, it's an easy fix. Simply fill a spray bottle with water and spray it directly to the underside of the screen (with the emulsion already attached). You'll be able to see the emulsion take hold, as it becomes a little darker. It may require a little longer to dry, but at least you'll have a good emulsion barrier, which is going to be the key to a good print.Tip #4:Don't be in a hurry. The screen can take a long time to dry. The Yudu has a built in drying rack and fan. Each drying cycle is 20 minutes. I often had to go through 5-6 drying cycles for a full emulsified screen to dry. Bottom line: give yourself plenty of time. The prep work is the most time consuming, but it's also the most important.Tip #5:Platen adhesive sheet. This is a sticky sheet to place your item on to hold it in place while screen-printing the design. I didn't use it and I had no problems with shifting.Tip #6:Save your coupons. Most places won't let you use a coupon to purchase the actual Yudu machine, but you can use them for the supplies and you'll want to. They are not cheap.I was amazed how quickly printing went. I printed the fronts of 18 shirts in about 15 minutes. Considering this was my first time, I think they came out great!