
Cheese Ball in a Jar
As a kid, I didn’t understand the appeal of a cheese ball. As an adult, I fully appreciate the wonder. This year, I decided to share my love of a good cheese ball with my co-workers.
It’s sometimes difficult to come up with co-worker gifts. I needed twelve in total, so I didn’t want it to be too costly. This season seems to have been extra busy, so it couldn’t be too labor intensive either. My mom needed a few gifts too, so we split the effort.

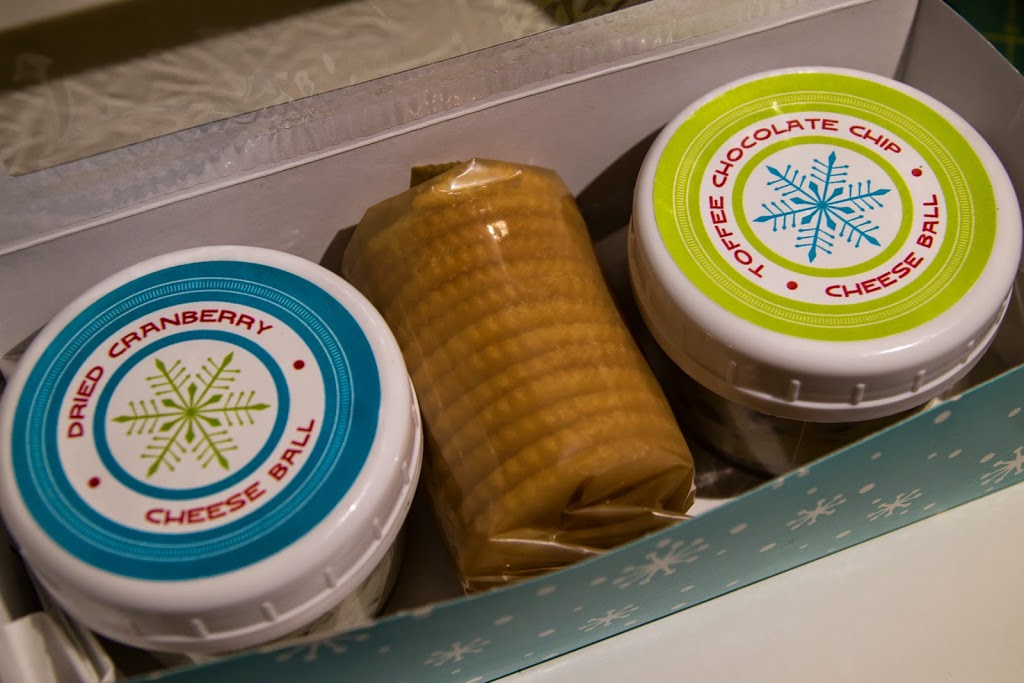
The Recipes:I’ve shared this Dried Cranberry Cheese Ball recipe before. It's not only a personal favorite, but it’s become a favorite of my modern quilt guild too!
Dried Cranberry Cheese Ball
Fills five 4 oz. jarsINGREDIENTS:
8 ounces cream cheese, softened
1 cup sour cream
4 ounces dried cranberries, chopped
1 bunch green onion, chopped
2 Tablespoons cilantro, chopped
1-2 jalapenos, seeded and chopped
Juice of 1 lime1 Tablespoons sugar
Pinch of salt1/2 cup pine nuts, toasted and chopped
DIRECTIONS:
1. In a bowl, combine cranberries, lime, sugar and salt. Set aside.
2. Toast pine nuts in a pan on the stove. Let cool to touch, then chop.
4. Mix cream cheese and sour cream together.
5. Add cilantro, green onion and cranberry mixture. Thoroughly combine.
6. Spoon into jars and top with toasted pine nuts.
Cheese ball method: To make this recipe into a traditional cheese ball, mix as directed and then place onto plastic wrap and form into a ball. I like to refrigerate it so it firms up a bit and then roll it in toasted pine nuts!
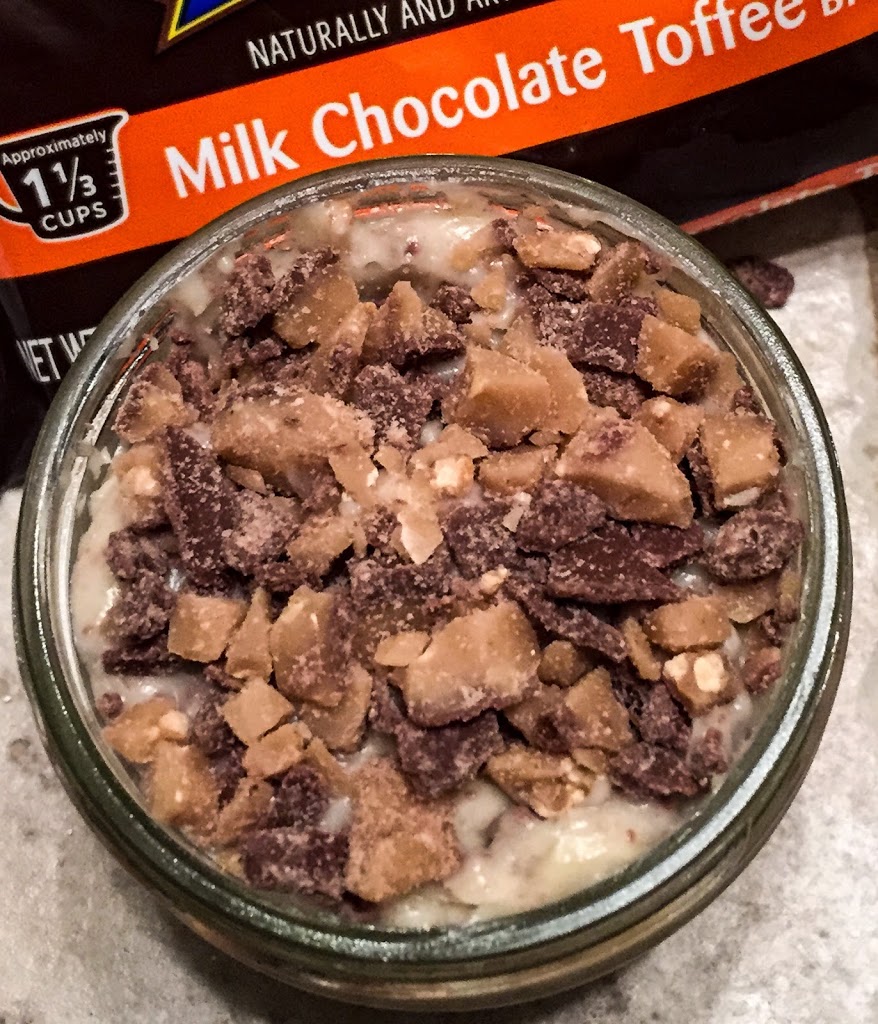
Toffee Chocolate Chip Cheese Ball
Fills six to seven 4 oz. jars
INGREDIENTS:8 ounces cream cheese, softened1/2 cup butter, softened (1 stick)2 Tablespoons caramel sauce (in the ice cream topping isle)2 Tablespoons brown sugar, packed1/2 cup chocolate chips, chopped1/2 cup Heath Toffee piecesApproximately, another ½ cup of Toffee pieces for topping.DIRECTIONS:
1. Combine cream cheese and butter.2. Add caramel sauce and brown sugar.3. Stir in chocolate chips and toffee.4. Spoon into jars and top with toffee pieces.
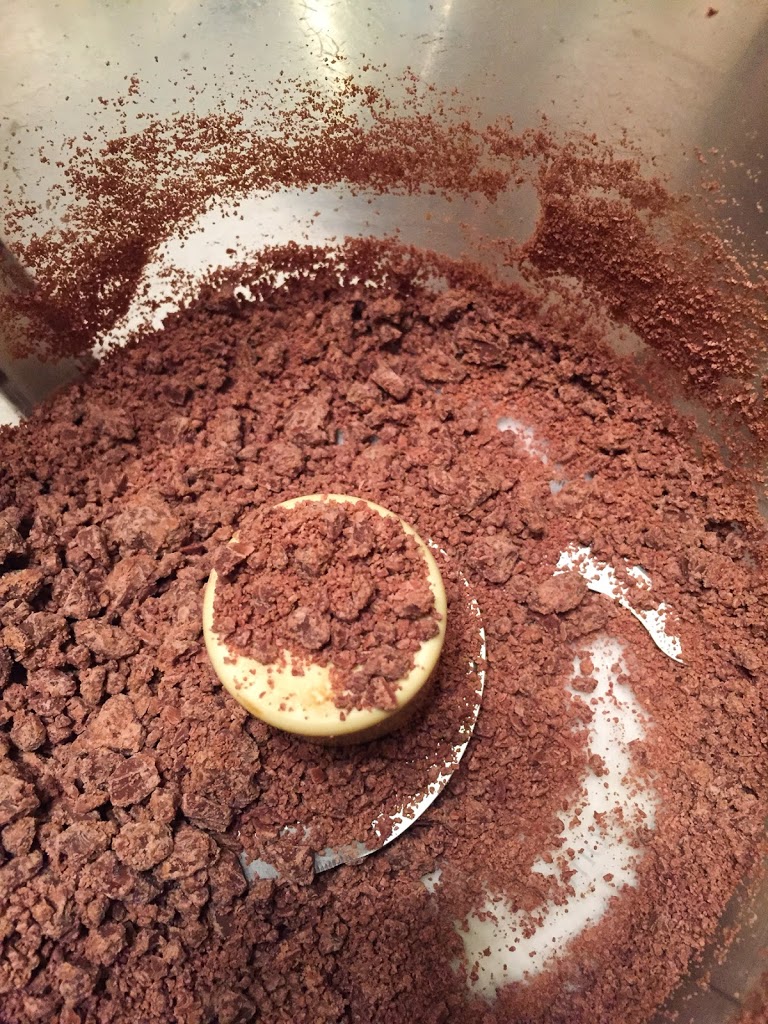
About the chocolate…we had too many batches to hand-chop the chocolate chips, so I used a food processor. You can use mini-chips, I just prefer the look of hand-chopped chocolate. After running through the food processor the chips will be irregular and you’ll get some chocolate powder. I just took a scoop (powder and all) and added it to my mixture. I like that it gave the cheese ball a little more color throughout.

Cheese ball method: To make this recipe into a traditional cheese ball, mix as directed and then place onto plastic wrap and form into a ball. Refrigerate so it firms up a bit and then roll it in a more toffee pieces, mini chocolate chips, pecans or a combination of all three!
Filling the jars:Using a regular small spoon is the easiest way to fill the jars. Fill the jar about half-way and then use the spoon to ‘pack down’ the cheese ball into the bottom of the jar. What you’re really doing is eliminating air pockets and making sure every corner of the jar is filled. Fill to one-quarter inch from the rim of the jar.
It’ll be little messy, so wipe the rim with a damp paper towel and then sprinkle your topping evenly across the top and seal with a lid.
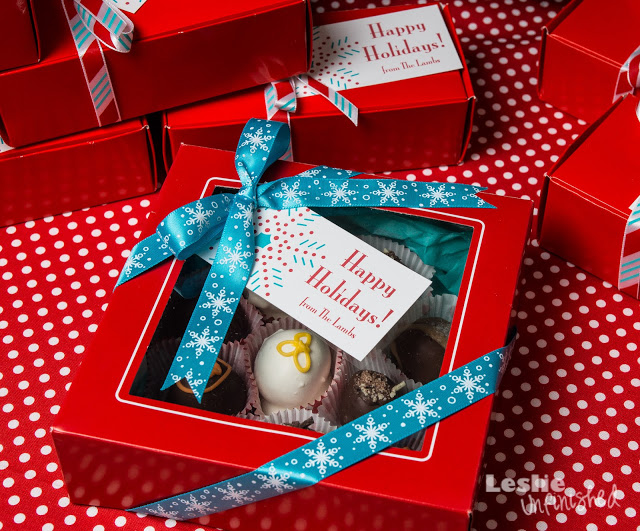
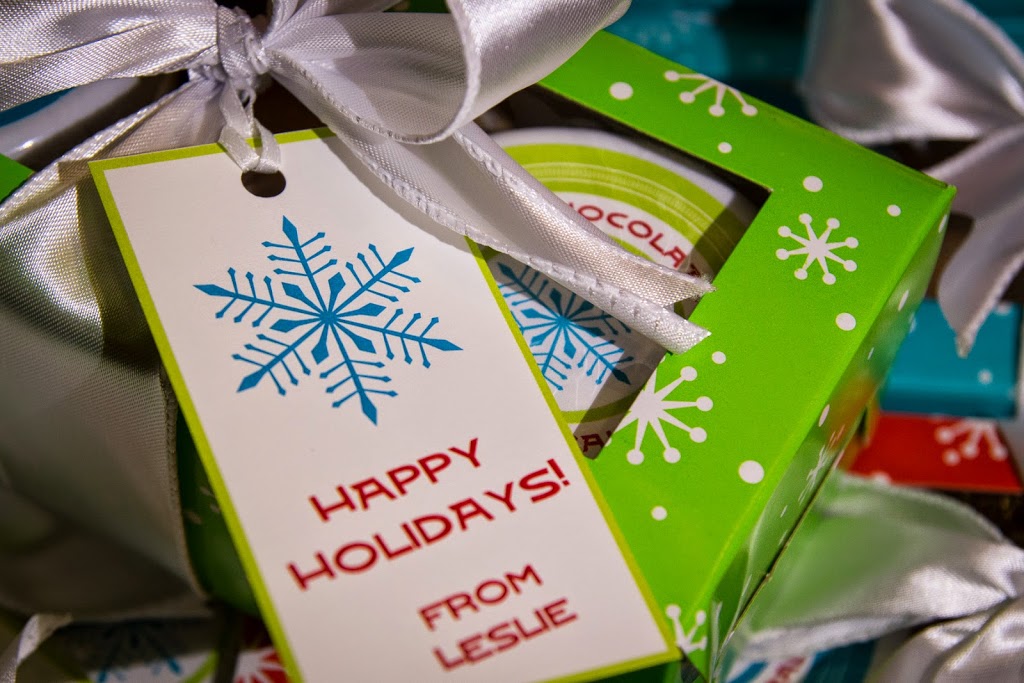
Packaging:I ordered boxes before I knew what I was doing. I’m like that. So, with the boxes in mind, we chose 4 ounce jars and decided to put labels on the lids since they would be visible through the clear top.

Creating and printing the labels was easy. I purchased 2.5” round labels by Avery and went to the Avery website. There’s a style number on the package and I entered that number on their website. If you don’t have the capability (or desire) to create your own graphics, Avery makes it easy with their pre-made designs. You can edit the lettering to fit your needs, place a sheet of labels in your printer and print!
Or, if you have software to create your own graphics, you can upload an original design. Since making is half the fun, I created my own labels and uploaded them to the Avery site.Tip: When creating your own graphics, make sure your design is larger than the size it will be printed. That way, when you upload your design, you can shrink it to size and keep the detail. If your design is too small and you have to enlarge it to fit, you’ll lose detail and be unhappy. Additionally, it is virtually impossible to print your design absolutely and perfectly centered. Size your graphic to bleed over the edge of the label and don’t worry about it.
I purchased the boxes online from Oriental Trading Company. They were sturdy enough, but didn’t really stay tightly assembled when you opened the top. Once assembled, I taped the sides. When filled, I taped the lid closed and tied a large ribbon around its center to keep it firmly together. I made a quick tag on the computer as well and printed it to cardstock.